
幼稚園児のときに大好きだったひっかき絵。あの時代は白い画用紙にクレヨンでゴリゴリカリカリして一生懸命描いていた。
まず画用紙を異なる色同士が重ならないように複数の色のクレヨンで塗りつぶし、それらの色が見えなくなるまで黒のクレヨンで上塗りし、釘などの先のとがったもので黒のクレヨンの層を削り取っていくと色鮮やかな絵が浮かび上がる。きれいな色が現れると心がわぁっとなるあの瞬間が好きだった。ただ、クレヨンのカスが出てあちこちが汚れてしまうのが玉にきず。
でも!
最近「第2回知財人お絵描き選手権」への初参加をきっかけに、お絵かきアプリでひっかき絵を作る方法を見出してしまったのだ。
「絵では勝負できない自分が独自性を出すためにはどうすれば良いか」を考え、デジタルひっかき絵を作ってみることを思い立った結果だ。
簡単な思い付きなので既に誰かが公開している方法である可能性が高いが、あえてネットで検索する前に私のやり方を公開してしまおうと思う。
お子さんとお出かけ中の待ち時間にも役立つとても便利で楽しい遊びになり得ると思うのでお試しいただけたら幸いである。
[1]お絵かきアプリをダウンロードする
記事の上の絵は、WACOMのIntuosという、パソコンに接続して好きなペイントソフトを使って絵が描けるタブレット、を買ったときに付属されていたClip Studio Paint Proというペイントソフトと上記タブレットを使って描いたものである。下記リンク先にある商品だ。


でも、このようなものを買わなくてもパソコンがなくてもスマホさえあれば無料のお絵描きソフトをダウンロードしてデジタルひっかき絵を描くことができる。
色々なアプリがあるが、レイヤー機能があるものであれば何でも良い。
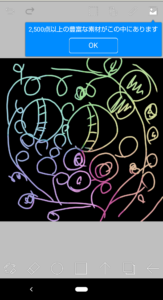
本記事用に私がスマホで作った試作品はこちら。禅タングル風に描いてみた。
私がこのときダウンロードしたのは「アイビスペイントX」というアプリ。アイフォン版もアンドロイド版もある。
[2]お絵描きアプリを使ってひっかき絵を描く
お絵描きアプリを使ってひっかき絵を描く方法は以下の通りである。
(i)新規用紙(下のレイヤー)を複数の色で塗りつぶす。
(ii)その上のレイヤ(以下、上のレイヤー)を黒などの濃い色で全部塗りつぶす。
(iii)消しゴムで上のレイヤーに絵を描くと絵の線(消しゴムの軌跡)の下にある下のレイヤーの色が現れる。
より具体的に、無料アプリ「アイビスペイントX」でのひっかき絵の描き方を例として以下に説明するが、どのアプリでも似たような機能があるはずなので操作はあまり変わらないと思う。私もマニュアルを読んで操作したわけではなく、適当に試行錯誤しながら描けたので、たぶん簡単である。
例えば、虹色(赤、橙、黄、緑、青、藍、紫)の絵が浮かび上がるひっかき絵を作る場合は以下のようにすればよい。
(1)アイビスペイントXを立ち上げたら「マイギャラリー」を選択する。
(2)画面左下の「+」を押し、好きなサイズの「新規キャンバス」を選択する。例えば「1:1」を選んでみよう。選ぶと白い新規キャンバスが表示される。
(3)画面左下から2番目のブラシのマークを押し、自分にとって描きやすい「ブラシ」を選択する。好きな太さや質感のものを選んでダブルタップ。
(4)画面下中央のボタンを押して赤色付近を選び、同じボタン(このときは下向き矢印の先っぽが二つ重なったようなマーク(以下、「戻るマーク」と呼ぶ)に変わっている)を押してキャンバスに戻る。
(5)用紙の左端から、用紙の横幅の1/7ぐらいの距離にある位置で、用紙の上端から下端まで縦に線を引く。線を引くときはタッチペンを使っても指先を使っても良い。赤色でぬりつぶす縦長のエリアを作るための線なので上端から下端までいっぱいに線を引くのがポイント。
(6)用紙の左端と(5)の線との間の縦長のエリアを(5)の線と同じ色でぬりつぶす。つまり、赤色は変更せずに、上記(3)と同じブラシのマークを押して、「塗りつぶし」を選択後、(5)で作った縦長のエリアをペン先か指先で押して赤で塗りつぶす。これで用紙の左端が縦長に赤でぬりつぶされたはずである。もちろん太めのブラシを選んで地道にゴシゴシ塗りつぶしても良い。
(7)次の色(虹色の場合は橙)を上記と同様の操作で選び、用紙の左端から、用紙の横幅の2/7ぐらいの距離にある位置、すなわち、(5)の線から用紙の横幅の1/7ぐらいの距離にある位置で、用紙の上端から下端まで縦に線を引く。
(8)(5)の線と(7)の線との間の縦長のエリアを(7)の線と同じ色で上記と同様の操作で塗りつぶす。
(9)上記(7)~(8)を繰り返すと、用紙全体が虹色に塗りつぶされる。
(10)画面右下から2番目のレイヤー選択ボタンを押し、画面左中央当たりに表示される「+」マークを選択することで2つ目のレイヤーを追加する。上記(9)までの作業で作ったのは1つ目のレイヤーであり、この2つ目のレイヤーは1つ目のレイヤーの上に重なるレイヤーである。つまり、クレヨンで描くひっかき絵でいえば、1つ目のレイヤーがクレヨンで虹色に塗った画用紙に、2つ目のレイヤーはその上に塗りつぶされる黒いクレヨンの層に、相当する。2つ目のレイヤーを作成した時点でこのレイヤーが選択された状態になっているので「戻るマーク」になっているボタンを押して(または「2」と書いてあるレイヤーの四角をダブルクリックして)2つ目のレイヤーの編集画面を表示させる。
(11)2つ目のレイヤーの全体を上記の操作と同様に黒で塗りつぶす。
(12)画面左下から2番目のブラシのマークを押し、「消しゴム」を押して、好きな太さや質感のものを選んでダブルクリック。これがひっかき絵を描くための筆となるので絵を描くのにちょうど良い太さを選ぶと良い。消しゴムで黒になった2つ目のレイヤーに絵を描くと、黒のレイヤーが消されてその下にあるレイヤーの色が現れるのでひっかき絵が出来上がる。
今回は下のレイヤーを虹色の七色の縦長エリアに分割したが、横長エリアに分割しても良いし、上の試作品のように放射状の分割エリアを色々なパステルカラーで塗るのも楽しい。色々な分割方法や色を試していただければと思う。
知財関連のお仕事をされている方向けに英文の説明も作ってみたのでご興味のある方は以下を読んでいただけたら嬉しい。実施例っぽい部分は力尽きて書けていない。実際の特許翻訳では使わないような表現もあり突っ込みどころもあると思うが、一応ひっかき絵を描きたくてここにたどり着いた人が読んでもわかるようにしてあるつもりである。
Method of Creating Scratch Art
This article is related to methods of creating scratch art.
Scratch art is the art where the artist draws a picture on a medium having two layers of different colors by scratching off bits of the upper layer to reveal the lower layer beneath the upper layer.
A well-known method of creating scratch art is the method where different areas on a sheet of paper are respectively colored with crayons of different colors, these different colors are completely covered with a layer colored completely with a black crayon, and a colorful picture is drawn as bits of this black layer is scratched off with an empty ball point pen or anything hard and pointy. However, this method can be messy, as bits of black crayon are scattered all over the place when the black layer is scratched off. It is also thus not an ideal thing for a child to do when the child is traveling on public transport. This method also takes time and requires different materials and tools including crayons, sheets of paper, and scratch pens.
A new method according to this article allows a user to create scratch art conveniently by use of software, without making any mess.
(1) A method of creating scratch art by using a piece of painting software, the method including:
coloring a first layer with a first color;
covering the first layer with a second layer having a second color different from the first color; and
erasing a part of the second layer to reveal a part of the first layer by using an eraser tool on the second layer.
(2) The method according to (1), wherein
the coloring includes coloring the first layer with different colors including the first color.
(3) The method according to (1), wherein
the coloring includes:
coloring different areas on the first layer respectively with different colors including the first color.
(4) The method according to (3), wherein
the coloring the different areas includes:
forming a first area that is one of the different areas by drawing a first boundary line through use of a brush tool, the first boundary line having the first color and serving as a boundary of the first area; and
coloring the first area with the first color by using a paint bucket tool.
(5) The method according to (4), wherein
the coloring the different areas includes:
forming a second area that is another one of the different areas by drawing a second boundary line through use of the brush tool, the second boundary line having a third color that is one of the different colors; and
coloring the second area with the third color by using the paint bucket tool.
(6) The method according to (2) or (3), wherein
the second color is different from each of the different colors of the first layer.
(7) The method according to (6), wherein
the second color is darker than each of the different colors.


コメントを残す